Saturday, June 25, 2022

Sending Emails from Python Django using your gmail account

Normally applications need to send the verification code or welcome messages to the registering user for their application using emails. 

Sending email is not hard in if we are developing the backend of the application using Python or Python framework like Django. 

As the first step we need to configure our gmail account to allow us to send email using code without login in to gmail and sending manually. 

  1. Login to your gmail account 
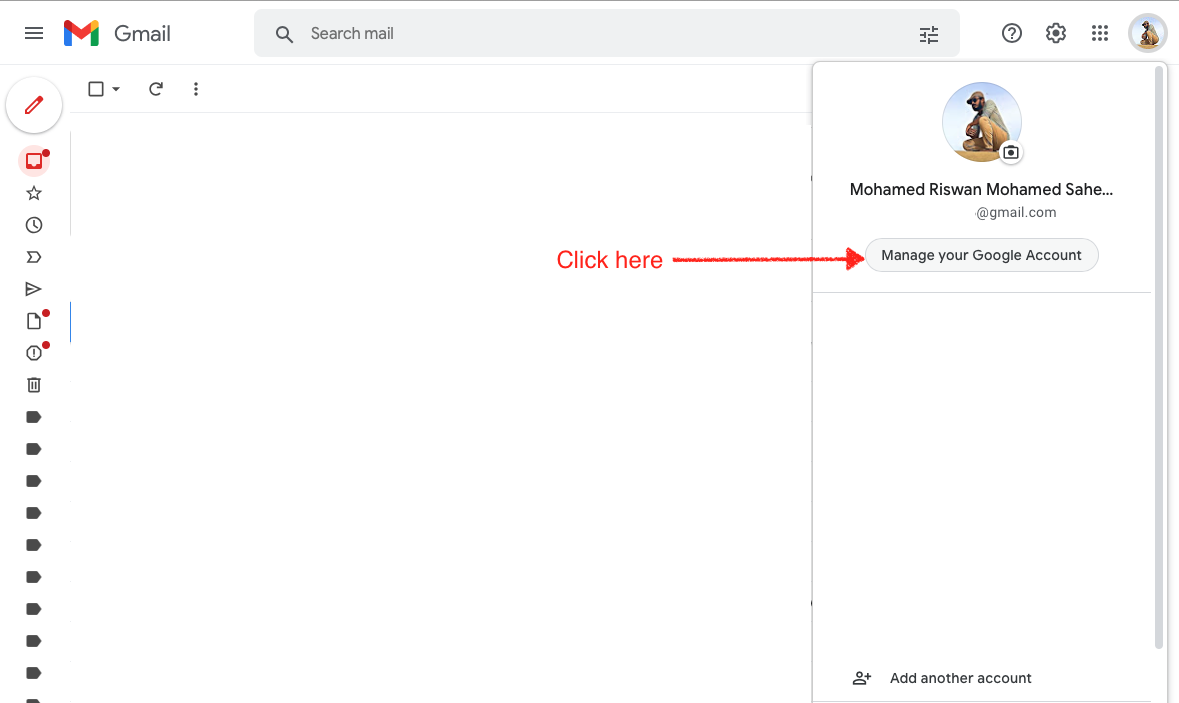
  2. Click on the profile icon shown in the top right corner of the browser window in gmail
  3. Click on "Manage your Google Account" button like shown in the below image.


  4. Choose Security tab in the screen shown after the above step


  5. Scroll down to see the section "Signing in to Google" section
  6. Enable two step verification there by giving your mobile number or some other method of verification. 

  7. Once clicked on Get Started button on the popup ti will ask you to login again.
  8. Once the above step finished you can see a new item in the "Signing in to Google" section which will look like the below

  9. Click on the App passwords in the above mentioned window which will open up another screen where you have to select the custom app name and generate a password. 


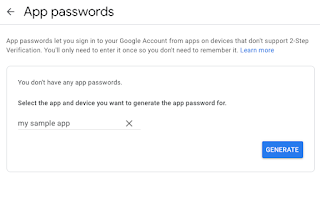
  10. Once you give a name for your app the "GENERATE" button will be enabled click on it to generate the password and copy the password. The password shown here is only showing one time there for carefully copy it and past it in a place where you can access later.
We have finished the configuration of gmail now. We can use the gmail as the sender email in our Django code.

Goto the Django settings file and make the configuration settings like below 

EMAIL_BACKEND = 'django.core.mail.backends.smtp.EmailBackend'
EMAIL_HOST = 'smtp.gmail.com'
EMAIL_USE_TLS = True
EMAIL_PORT = 587

EMAIL_HOST_USER = 'your_username@gmail.com' # replace your_username
EMAIL_HOST_PASSWORD = 'xxxxxxxxxxxxxxxx' # use password generated above

In your model file you need to import the EmailMultiAlternatives from Django core module then you can send the email using the below lines of code.

from django.core.mail import EmailMultiAlternatives  

message = EmailMultiAlternatives(
subject = subject,
body = body,
from_email = settings.EMAIL_HOST_USER,
to = [email,] #more email address can be added
)

message.mixed_subtype = 'related'
message.attach_alternative(body, "text/html")
message.send()


Tuesday, June 14, 2022

Setup Google Analytics with React JS web application - Part 1

We need to navigate to the analytics page of Google first using the link https://analytics.google.com. If we are new to google analytics (ga) we will see a welcome screen like the below image.

Once click on the "Start measuring" button it will show an account setup screen where we need to enter any name for "Account name" field then tick on "Google products and services" option if needed and click on "Next" button.


The Property setup window will show where you have to enter any value which represents your web application. After entering a name click on "Next" button.

It will ask for some details about the business like which category the business belongs to and the business size and some other data. Once fill it click on the Create button shown bottom part of the screen.


Once click on Create button it will pop up a message where we need to accept the terms of service. There might be more than one check box that needs to be ticked. Scroll down in the popup and tick all the checkboxes then click on the "I Accept" button.

Once we did the above setup it will show the dashboard. The Data Streams tab in the left panel is chosen automatically and it will display the option to choose our platform. Here we will choose Web as our platform since we are going to add analytics for our react web application.


Once the web button is clicked in the above step it will bring up a popup window where we have to choose a website URL of our react web app. If we already know the URL where we are going to publish our web app then we can enter that URL in the Website URL field. If we don't know the URL we can just give some testing URL. Also in the Stream name, we have to provide a value, here we can say the website name if we already know it otherwise we can just give any value. Once we have given values for both of the above-mentioned fields we need to click on the "Create stream" button.


After that Web stream details page will appear where we have to copy the code in the Tagging instructions section. Click on the Global site tag option then it will grow to show the code which will look like the below image. Copy the shown code using the copy button provided tehre.


Next, we have to add react-ga package which we are going to use to send the data from our web application to google analytics. To install the above package using npm package manager uses the command "npm install react-ga". This command need to be run from inside the current react js project directory.
npm install react-ga

After that, we need to open the file called index.html inside the public directory of the react js project. Here we need to be more careful that we are going to open the folder named public, not the folder src which normally we use. Past the code which we copy from the above step inside the head tag of the above-mentioned index.html file. Once we copy the file will look like the below image.


We will see how to track the analytics in the next article...

Sunday, June 5, 2022

create-react-app inside a already created folder

 Once we create a GitHub repository and cloned it into the local machine for development. We can use the same repository to hold the react app.

If we are using create-react-app most of the time we use it with a project name which will be the folder name for the react project. In this case we use something like create-react-app my-app here the folder named my-app will be created and will hold the react project.

Anyhow If we wanted to create a react project inside the cloned repository from GitHub or already named directory we could do it using create-react-app . command (notice the '.'). It will create put all the react code inside already created or cloned folder.